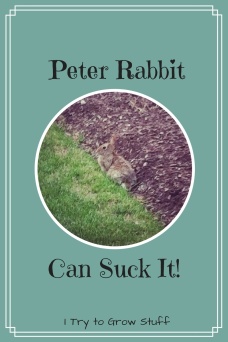
Peter Rabbit Can Suck It!

Peter Rabbit Suck it


Oh, I feel Amy’s pain because our new house is hoppin‘ with rabbits!

I mentioned in my post about cleaning up my new garden, that we have something like 3,423,349,342 rabbits in our neighborhood. At least three of those have been in my garden.

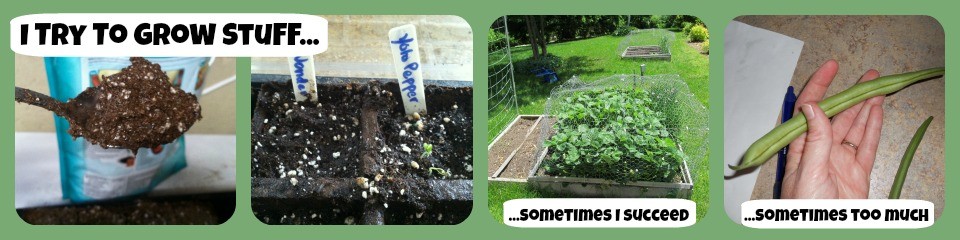
I can tell they’ve been in my garden based on two things, 1) something ate all the leaves off my green bean plants, and 2) I caught the little farts red-pawed twice, sitting in the corner of my garden when I came out to pet my plants. Yes, I pet my plants – the leaves – and whisper sweet-nothin’s to them. Especially after those rabbits have been in there terrorizing them.

The first rabbit I found was absolutely tiny and precious and could have fit in the palm of my hand, which also meant it could get into the tiniest of cracks in my garden fence, so even though it was super-duper cute, I hated it. So I went to work enclosing my entire garden in chicken wire. I had already wrapped wire around each individual tomato plant, but that didn’t protect my beans.

IMG_2678

The small crack in the fence the tiny rabbit was getting in. I took care of that!

The previous owners had put some metal fencing along the base of the cedar fence surrounding the garden, but it clearly wasn’t enough. So I added chicken wire. The problem is that I can’t get the chicken wire to stay in place because I haven’t been able to locate our staple gun since we moved to our new house and I’m too much of a wuss to ask the neighbors to borrow theirs.

Since I couldn’t get anything less than a floppy fence, that the rabbits probably used as a spring board to launch themselves into my garden, I decided to try a liquid attack.

IMG_2726

My floppy, springboard chicken wire fence that’s totally going to keep the rabbits out.

I decided to a try a recipe I found on Pinterest for Frugal Homemade Organic Rabbit RepellentOther recipes called for urine, but I was not about to pee in a milk jug.

This recipe required water, crushed garlic, dish soap and red pepper flakes. But as is typical with my gardening, I didn’t have all the ingredients (red pepper flakes) and therefore did a half-a$$ job with it, just like removing the phallic fungus from my garden. So I improvised with Tabasco sauce and cayenne pepper – I’m sure that’s the same, right?  I mixed it all up and let it sit out in the sun for three days so all that good spicy crap could meld together and offend those fur balls.

IMG_2602

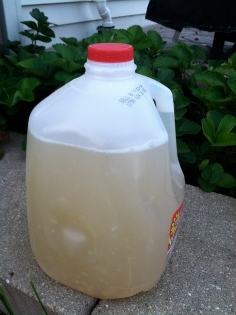
The Offender of Fur Balls

On the third day, I brought my melded Offender out as the neighbor was coming out of her house.

Neighbor: “Oh, did you make up something good to drink?”

Me: “Um…no, this is rabbit repellent.”

“Oh, well I haven’t seen many other than that little one…” (Haven’t seen many? They’re freaking everywhere!) “…but Charley [the dog] got it. I try to get rid of them different ways, but he got it before I saw what happened.”

One down, 3,423,349,341 to go.

I poured the Offender on anyway because I knew there were other rabbits. The next two days (before I had fully enclosed the garden in chicken wire) I came out and found Giant Bunny Foo-Foos hopping in my garden! But the beans were okay. It seems they were eating my dead plants awaiting their trip into the compost bin.

But to keep my furry foes from being tempted, I finished “circumfrencing” the garden with chicken wire. I resembled a mad scientist with my clothes sweat-stained, face flushed, hair askew, as I unraveled wire, hammered in ground stakes, and splashed Offender hither and yon.

But, it seems that the spicy melded offensive liquid combined with my semi-reinforced floppy springboard chicken wire fence is working. I’m currently successful with keeping rabbits out of my garden. Woo-hooo!!!

Then this morning I saw a chipmunk run across the freaking lawn. GAAAHHHH!

So, how do you keep rabbits out of your garden? 


Thanks for visiting my “gardening with humor” blog. Sign up to follow my blog to get notices every time I post. There’s a box in the top right corner up there. I’d put it right under this blurb, but I don’t know how.

Phallic Fungus: Getting Stinkhorn Out of Your Stinkin’ Garden


We moved to a new house where the yard is heavily mulched with wood chips. It looks really nice, but I don’t have much experience with mulch simply because mulch costs money and I’m lazy.

After a few heavy rains I noticed these nasty things growing in our yard.

stinkhorn fungus

Ick! That greenish-brown wet-looking area toward the top is indeed wet, and reeks of decaying flesh, therefore attracting flies. Some of these were up to around seven inches long.

After some research (asking my friends on Facebook what this stinky, slimy crap growing in my yard and attracting flies is) I learned that it’s a fungus called Stinkhorn.

So I googled “Stinkhorn.”

I learned that it produces its slimy, stinky substance to attract flies because that’s how the spores are spread. See, God does have a sense of humor, but…barf.

While deep in research, I noticed that the latin word for the family of Stinkhorn mushrooms is “Phallaceae,” as in “phallic.” Yep.

Later, my friend, Julie, added this photo to my “WTH is this crap growing in my yard” Facebook thread.

julie fungus

Source: JulieDeNeen.com

This mushroom is also found in the Phallaceae family of fungi. The latin name truly fits.

And, I guess not so ironically, this is the stinkhorn egg when it’s cut open.

I’m not making this stuff up.

So obviously I didn’t want these things growing in my yard and I definitely didn’t want them to spread, as they were doing so quite quickly. So based on my friend Kenya’s advice and what I googled on how to get rid of them, I did the following:

Got a plastic trash bag and gloves. They suggested disposable gloves, but I didn’t have any, so I wore ski gloves. Just kidding, I wore gardening gloves.

I dug those suckers out, “roots” and all. The “roots” look like small white eggs and there were a lot of them. I kind of felt like a gold miner digging for nuggets of gold, except I hated the freaking gold I found.

stinkhorn roots

I put everything I dug up into a plastic bag.

I tied it up and threw it in the trash, not in the compost bin or with other yard scrap waste, in the trash.

Some people recommend boiling water and bleach to get rid of the remaining spores, but I didn’t do that because…boiling water and bleach.

Then I left my gloves and trowel in the sun to roast all that lingering nasty sporey fungus off.

I’ve looked back in my garden every day to see if any stinkhorns grew that I had missed. I found a few and dug those up and threw them away. Actually, I just threw them in the middle of my driveway to die and roast because I was too lazy to get a trash bag.

That was last week.

We had another heavy rain two nights ago and wouldn’t you know it, those freaking things came back with a vengeance. I dug their little fly-infested, stinking souls out of the ground again. This time, I relented and got the boiling water out along with a trash bag. But, being my lazy self, I just hit one small area with the water and decided to see how the rest goes with just being removed and tossed in the trash – at least I didn’t leave them in the middle of the driveway this time.

I went out five minutes ago to check again. I only saw two small Stinkhorns which I quickly removed. And that was all great, but then I found THIS! What the heck are these?!?

small mushrooms

The battle continues.

Next battle: RABBITS!

Have you had Stinkhorns in your yard? How’d YOU get them out? 


Cleaning Up a Garden Full of Weeds

Y’all we finally moved to a new house three weeks ago, so I’m reviving this blog. The new house even came with a garden. Check it out.

weedy garden mess

Oh no they di’int?

Oh yes, they did leave me with this junk. It’s okay, it’s my new project.

Under all those weeds and mint and boards and dead blueberry bush there’s a drip irrigation system. Do I know how to use it? Nope. Will I learn? Um…eventually…maybe.

There’s also a rain barrel. I don’t even know how to hook that thing up. At least I think it’s a rain barrel. My husband removed the lid and looked inside and jumped straight up in the air. There was a log in the bottom. A log made him jump.

And there are rabbits. There are 3,423,349,342 rabbits in our neighborhood to be exact. I counted them. I’ve seen ONE squirrel and 3,423,349,342 rabbits in three weeks. I made rabbit repellent yesterday, so I’m going to test it out and write a post about it. I also started putting up chicken wire everywhere, but I can’t find my staple gun to staple it to the fence, so it’s more like a wavy jungle gym for the rabbits to play on.

So far the garden looks like this.

messy garden project

I had started some tomatoes and peppers from seed at our old house, so I brought the growing plants with me when we moved. I’ve been square-foot gardening for the past five years, so this directly-in-the-ground gardening is kind of new to me. I’m sure there will be a lot of mistakes.

And this is my little strawberry patch (there are two of these).

strawberry patch

I had to bid farewell to my raspberry patch in my old yard. It wasn’t tearful, but I felt a little verkelmpt. The new owners are probably eating my raspberries, the ones I started from two little canes, right now for breakfast, on a bed of fluffy pancakes with real maple syrup and melted butter.

What I’ve got growing:

In the ground: tomatoes, peppers, strawberries, green beans (I replanted more this morning)
In pots: carrots, thyme, basil, chives and oregano
If I’m not too lazy, I’ll add: kale and lettuce

Future of this blog:

I’ll be amping up this blog to make it look sharp now that I’ve been to BlogU and learned how to make my blog not look like crap. I’m going back to my previous five posts and making everything look tight. So hold on to your gardening trowels, I’ll be back!

In the meantime, I created this Pinterest board for this blog. So go follow it: I Try to Grow Stuff.

Next post will be about Phallic Fungus I found in my yard. No lie.


Seeds Be in Da Hooouuuse! (or How to Plant Seeds Inside)

It’s time to plant your seeds, peeps!

How to grow seeds inside

Okay, here’s how I plant my seeds inside in early Spring for later transplant into my garden.

What I use:

Garden plan – I need to know how many plants I want to grow. See: You Mean I Actually Have to PLAN a Garden?  My first year I went crazy and planted extras thinking I would find room for them. There’s no room. I was begging people to take my plants. Plus it costs money for all that potting soil later. Now I only plant what I need, maybe a couple extra.

Seeds – I make sure I know when to plant them. See: When Do I Plant These Seeds, Yo?

Seed Starter mix – You can use potting soil, but I always use this stuff. I read that it doesn’t have any nutrients in it, so you need to give it some fertilizer later, which I do. And don’t be dumb like me and go buying three bags of seed starter. When you need to transplant to a bigger pot, you’ll need potting soil, not seed starter. I bought three bags of seed starter three years ago and I still have two and half bags.

Peat pots or plastic seed flats – I use both. Peat pots allow you to just transplant the entire pot right into the ground, thereby reducing transplant shock (I’ve never really had a problem with this. I think it depends on the plant). The roots penetrate the walls of the pot and then the pot disintegrates, leaving you with the peat that enriches the soil (I googled that part). I also use the plastic flats because they come with my tray and dome.

Plastic tray with clear dome – This is a handy way to keep all my seedlings together. It makes it easier to water them and the dome keeps the moisture inside.

Seed Markers and permanent ink pen – I record what I planted where unless because it’s hard to identify seedling leaves when they’re still babies.

Items for mixing the soil starter: A spoon from my kitchen (tablespoon size) – don’t tell my husband – large cup or bowl (I use a large plain Greek yogurt cup that’s going on its third year, but feel free to use any kind of mixing container), and water.

Image

(I didn’t have a picture of all that crap, so I’m using this)

1. I set up my pots/flats in the tray and write the plant names on the markers.

2. I put my seed starter in my Greek yogurt cup. I mix in some water until it’s moist, but not sopping wet. The first time I used seed starter I filled all the little cups on my plastic flat with the seed starter and then poured water in. That didn’t work. The seed starter repels water like I wish my stupid all-natural bug spray repelled mosquitoes. So I had to mix each little cup individually – what a pain. I ended up spraying the tray with a mister, but it took for-evah! Just mix it all up in a bowl…or Greek yogurt cup.

wet seed starter

Here’s my Greek yogurt cup (should Greek even be capitalized here?)

3. I scoop the moist, not sopping, seed starter into the pots. I put one to three seeds in every pot and insert the marker. I make sure that if I use pots or flats that are attached to each other that I either split them up ahead of time or I make sure to plant seeds with similar germinating times next to each other. (Germinating is a fancy word for green part sprouting out the of the seed. It makes me feel like I know what I’m talking about, so I use it.) Pepper plants can take two weeks to sprout, so I make sure they’re not in pots attached to tomatoes which take much less time.

Seed starting in peat pots

These look a little wet, but they turned out okay. This was taken last year.

4. I follow the directions on the seed packet about how deep to plant the seeds. Then I put the dome on.

They kind of look like prisoners.

They kind of look like prisoners.

5. I put the tray on top of my refrigerator for warmth, until they sprout. I check them everyday to make sure they’re moist enough. If they look like they’re dry then I spray them with a spray bottle, so I don’t drown them.

I also check for sprouting. Once the seeds have sprouted (green poking up through the dirt) then I move them to my homemade grow light system. I’ll show you how I made my light system next time. I can’t put all this goodness in one post.

Overall, it’s pretty simple to plant seeds if you have the right materials. It makes a mess, so lay down some newspaper or plant them in an area where you don’t care about messes. Also, this is a great thing to let your kids help with. Just remember the mess part.